
The Broker component is responsible for submitting jobs to an OurGrid site. It must be connected to a Peer so it can request Workers.
To see how to install the Broker, click here.
A job description file, or jdf for short, is a plain text file that contains a job description. Each job description file describes a single job. You can edit a jdf in the text editor of your choice. By convention, we use the .jdf extension to name all job description files.
A jdf file has two types of clauses in it: the job and the task clauses. You use the first type to specify common attributes for the entire job and the other one to specify particular attributes and commands to the tasks that comprise your parallel application.
| job: | |
| label: | A desciptive name for the job. |
| task: | |
| init: | Input data. The files that will be staged into the Worker. |
| remote: | Code for execution, which is a command line on the target resource. |
| final: | Output data. The files that will be staged out from the Worker. |
A job clause contains a (possibly empty) list of sub-clauses. For instance, the requirements sub-clause encompasses the list of requirements that need to be fulfilled by a worker node, so that it can be selected to run tasks of the job, while the label sub-clause associates a name to the job. This sub-clause is useful for tracking the execution of the job and also to associate the name of the output files to the job that has generated it.
Below we present an example of a jdf, which defines a very simple job named myjob1. It requires worker nodes that have the os attribute set to "linux" and the mem attribute set to a number greater or equal to 100.
| job: |
| label: myjob1 |
| requirements : ( os == linux and mem >= 100) |
| task: |
| remote: mytask |
As we mentioned before, all sub-clauses of a job clause are optional. If the label sub-clause does not exist in the jdf, an internal job id is used to identify it. If there is no requirements sub-clause, the Broker assumes that all worker nodes in your grid are able to run the tasks of your job.
Besides label and requirements sub-clauses, you may define default descriptions for all tasks of a job. This is further explained below.
There is one task clause to describe each task of a job. The number of tasks in a job is determined by the number of task clauses in the jdf. The task clause is used to describe all the phases of a task. A task is divided in initial, remote and final phases which are described by means of init, remote and final sub-clauses, respectively.
OurGrid provides a useful set of abstractions that allow you to write BoT applications without knowing details of the worker node file system. The basic idea is that you can have OurGrid transferring and retrieving files to/from the worker nodes in a per task basis. OurGrid defines two virtual directories for each task, called playpen and storage. In the task description you can instruct OurGrid to copy files to these directories. This assures that the worker nodes will have all necessary files stored locally, before the tasks are run. Analogously, you can instruct OurGrid to copy files from those directories back to the user's machine after the successful execution of the task. This allows you to gather the results.
OurGrid offers three operations to be used in the init and final sub-clauses, namely:
The operations put and store are used only in the init sub-clause, whereas get is used only in the final sub-clause.
The put command is used in init sub-clause to indicate files to be transferred to the worker node. As an alternative to the put command, you may use the store command. Both put and store perform conceptually the same operation: transfer a file from the home machine to a worker node. However, store checks whether the file already exists in the worker node (due to a previous transfer, for example) before transferring it. Therefore, we recommend using store for files that may be used many times, such as binaries and input files shared by multiple tasks.
In all above commands, localfile is the name of the file on the user's machine. If relative names are used, the Broker will consider the job description file directory as the base directory, whereas remotefile is the name of the file on the worker node. All remote file names are associated to the $PLAYPEN directory, if this is a put or get operation. In the case of store, the default directory is $STORAGE.
Additionally, OurGrid includes the $STORAGE directory in the worker node’s $PATH, since it is common to store executable files in this directory. By using get, put and store, we can rewrite the previous example as follows:
| job: |
| label: myjob |
| task: |
| init: put input input store mytask mytask |
| remote: $STORAGE/mytask < input > output |
| final: get output output |
The job contains only one task that starts by transferring a file named input to $PLAYPEN and a file named mytask to $STORAGE. The task then runs mytask in a worker node, reading the standard input from the file input, and writting the standard output in the output file. When the execution of mytask finishes, the final phase of the task is executed, fetching the output file back to the user's machine.
OurGrid automatically defines the environment variables $JOB, $TASK, $PROC, $PLAYPEN and $STORAGE and they respectively contain a unique job number, a unique task number, the worker node chosen to run the task, the directory created as the playpen, and the storage directory name. These variables are useful to define unique names for the input and output files of each task. For instance:
| job: |
| label: myjob5 |
| task: |
| init: put input input store mytask mytask |
| remote: mytask < input > output-$TASK |
| final: get output-$TASK output-$TASK |
| task: |
| init: put input input store mytask mytask |
| remote: mytask < input > output-$TASK |
| final: get output-$TASK output-$TASK |
It is easy to use OurGrid environment variables. You just need to refer to them as $PROC, $TASK, $JOB, $STORAGE and $PLAYPEN in init, remote and final sub-clauses. OurGrid transparently maps them accordingly to the operating system on which the task is going to run on (Microsoft Windows-like or Unix-like). Thus, with a single job description file, it is possible to run your job in heterogeneous grids. OurGrid environment variables are summarized in Table 1.
| Variable | Contents |
| $PLAYPEN | A new directory created to execute the task on the grid machine. |
| $PROC | The processor assigned to run the task. |
| $TASK | The number of the current task. |
| $JOB | The number of the current job. |
| $STORAGE | The path of the storage directory. |
In the last example, we showed how to use the OurGrid environment variables to write tasks. What they really enable you to do is to have tasks that are literally the same. However, doing a cut-and-paste for each task in your job does not sound good. It is much easier to use the job section to define defaults for all phases of its tasks. Consequently, the last example can be much easily written as:
| job: |
| label: myjob6 |
| init: put input input store mytask mytask |
| remote: mytask < input > output-$TASK |
| final: get output-$TASK output-$TASK |
| task: |
| task: |
Note that the empty task sections are needed to inform OurGrid how many tasks the job contains. As the name suggests, the default values set in the job clause can be overwritten in the task clauses. Consider the example:
| job: |
| label: myjob7 |
| init: put input input store mytask mytask |
| remote: mytask < input > output-$TASK |
| final: get output-$TASK output-$TASK |
| task: |
| init: put alpha input |
| task: |
Here, the first task copies the file alpha at the user's machine into file input at the worker node, and proceeds as before. The second task remains unchanged.
Worker node's attributes are user-defined strings that express the characteristics of the worker node. They can be used to define the job requirements. Job requirements are described by means of expressions involving these attributes. Most common arithmetic and logical operators are supported. Operators with higher precedence are evaluated before operators with lower precedence. Evaluation of operators with the same precedence is from left to right. This evaluation order can be changed by using parentheses. Table 2 lists all operators supported by OurGrid.
| Operator | Description | Example |
| ! | logical negation | !(os = windows) |
| NOT | logical negation | NOT(site = lsd) |
| && | logical and | (os = linux && site = lsd) |
| AND | logical and | (os = linux AND mem > 200) |
| || | logical or | (os = linux || os = hpux) |
| OR | logical or | (site = ufcg OR site = lsd) |
| < | less than | mem < 300 |
| > | greater than | mem > 300 |
| <= | less or equal than | mem <= 64 |
| >= | greater or equal than | playpensize >= 30 |
| == | equal | os !== hpux |
| = | equal | os = hpux |
| != | not equal | os != hpux |
A simple example job is available in the Broker package. To run the job click on the Add job link at your Broker GUI and select the JDF file you want to submit yo OurGrid. Use the Jobs tab to monitor your jobs status. If you prefer a command line interface, type:
Simple example jobs are available in the Broker package.
To add a job via the Ourgrid Portal you must zip all needed files, including the JDF files, and submit it using the OurGrid plugin, as following:
In order to add a job, upload your zip file using the OurGrid plugin, than select the desired job to run. After that, just press the submit button.
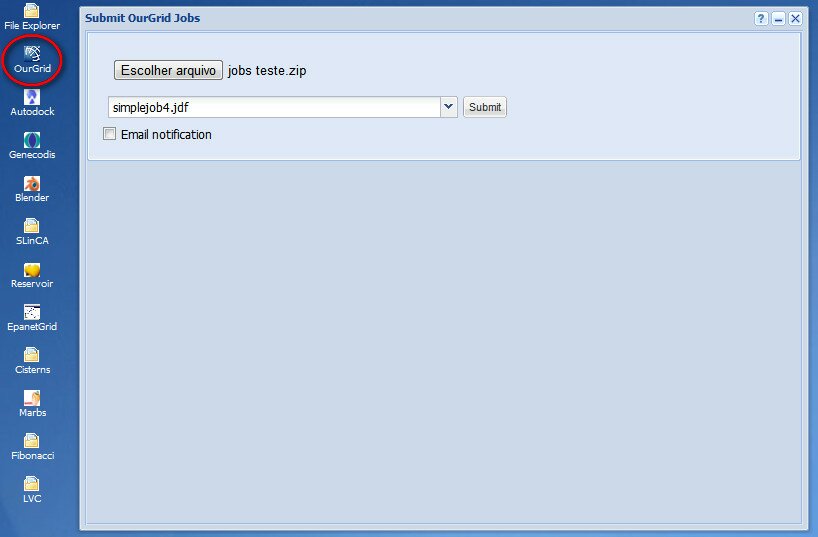
Figure 1 Screenshot of OurGrid plugin at OurGridPortal, where the user is choosing a job from the uploaded zip.
After the submission, a status tree will show up. You can monitor the status and download the output in this tree panel.
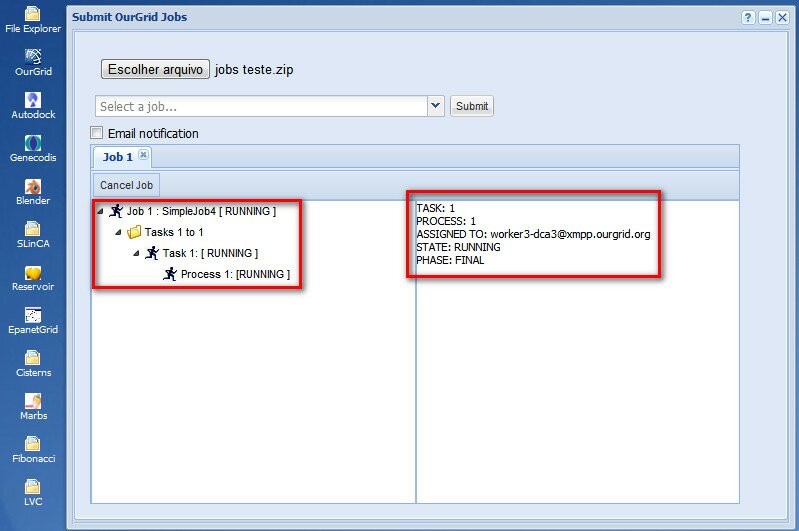
Figure 2 Screenshot of the Job Status Panel at OurGridPortal.
To add a job via the OurGrid Broker Interface do the following.
On the Broker GUI click on Add Job button.
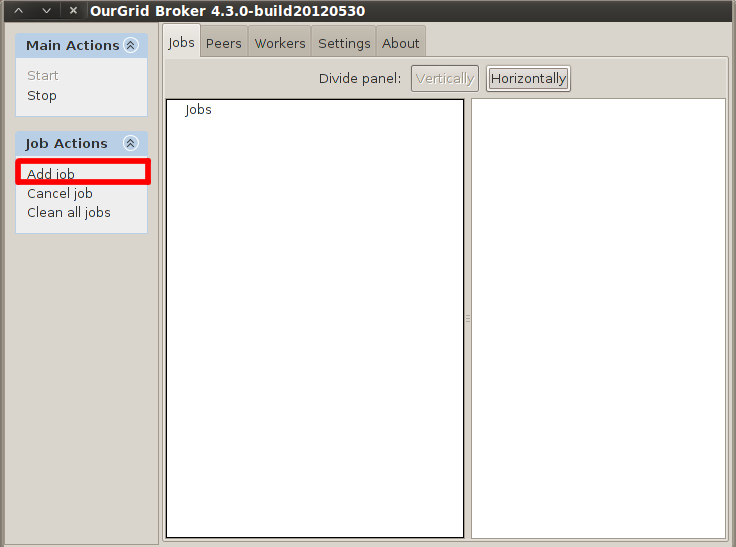
Figure 3 Screenshot of the Broker's GUI highlithing the Add Job link.
In the file chooser, select the .jdf file of the job you want to submit.
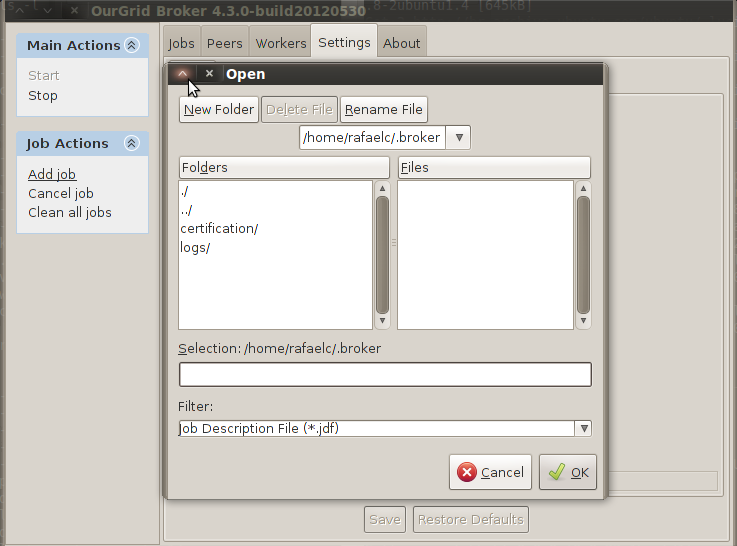
Figure 4 Screenshot of the Broker's GUI showing how to select a job.
To check jobs’ status and to manage them go to the Jobs tab panel.
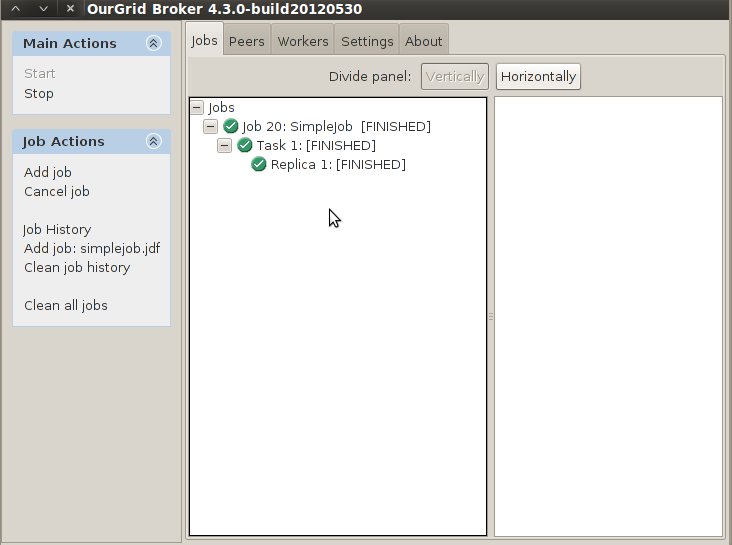
Figure 5 Screenshot of the Broker's GUI status panel.